
Basic Textures needed for Mapping - 2k Resolution
- Roughness map
- Normal map
- Metallic map
A great source fo textures Textureize
Textures when scaling always follow the POWER OF 2 RULE

An excellent resource, view his video linked below:
Unwrap Special - Full guide to efficient and fast UV Mapping - 3Ds Max 2017
Subscribe to his youtube channel. All resources below I learned from his video.
Avoid hard edges in UV Islands. Each island represents 1 smoothing group
Want to make sure all island are as straight and smooth as possible. You don't need to do this but is for greater results, especially if someone is paying for the work.
Some great commannds to use
Use AutoSmooth for smoothing group, the Flatten My Smoothing Group
Use Peel Mode to fix any issues with scaling or scewing
Use re-scale elements button to even out all UVs
Use Grow Selection to select more faces or edges
If Peel Mode makes a huge mess by overlapping everything- use Pack Custom button
Quick Planar Button is good for making quick islands
Convert Edge Selection to Seams makes the selected areas a UV seam.
To pack all the individual parts UV Maps do the following:
- Collapse all selected object.
- Then select all the UVs and hit re scale elements.
- Then you select the huge mess of UVs.
- This places all the UVs within the correct space
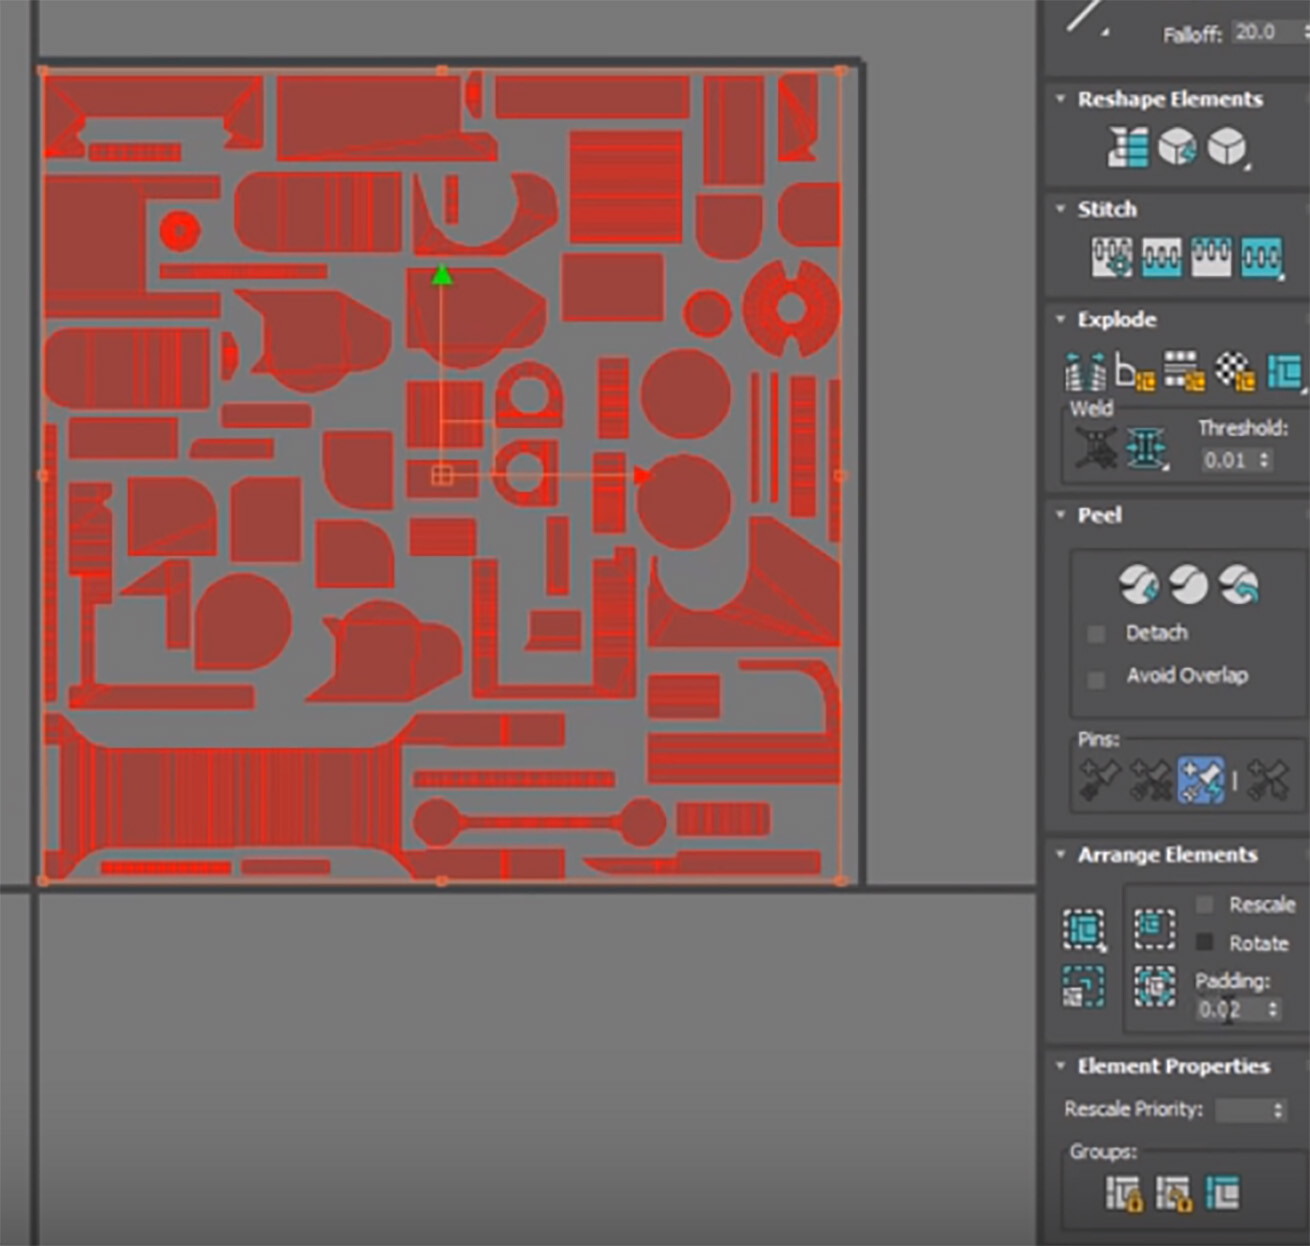
If there is too much padding, you can fix that by changing the
Padding option to like 0.01 from 0.02, the Pack Normalize again.
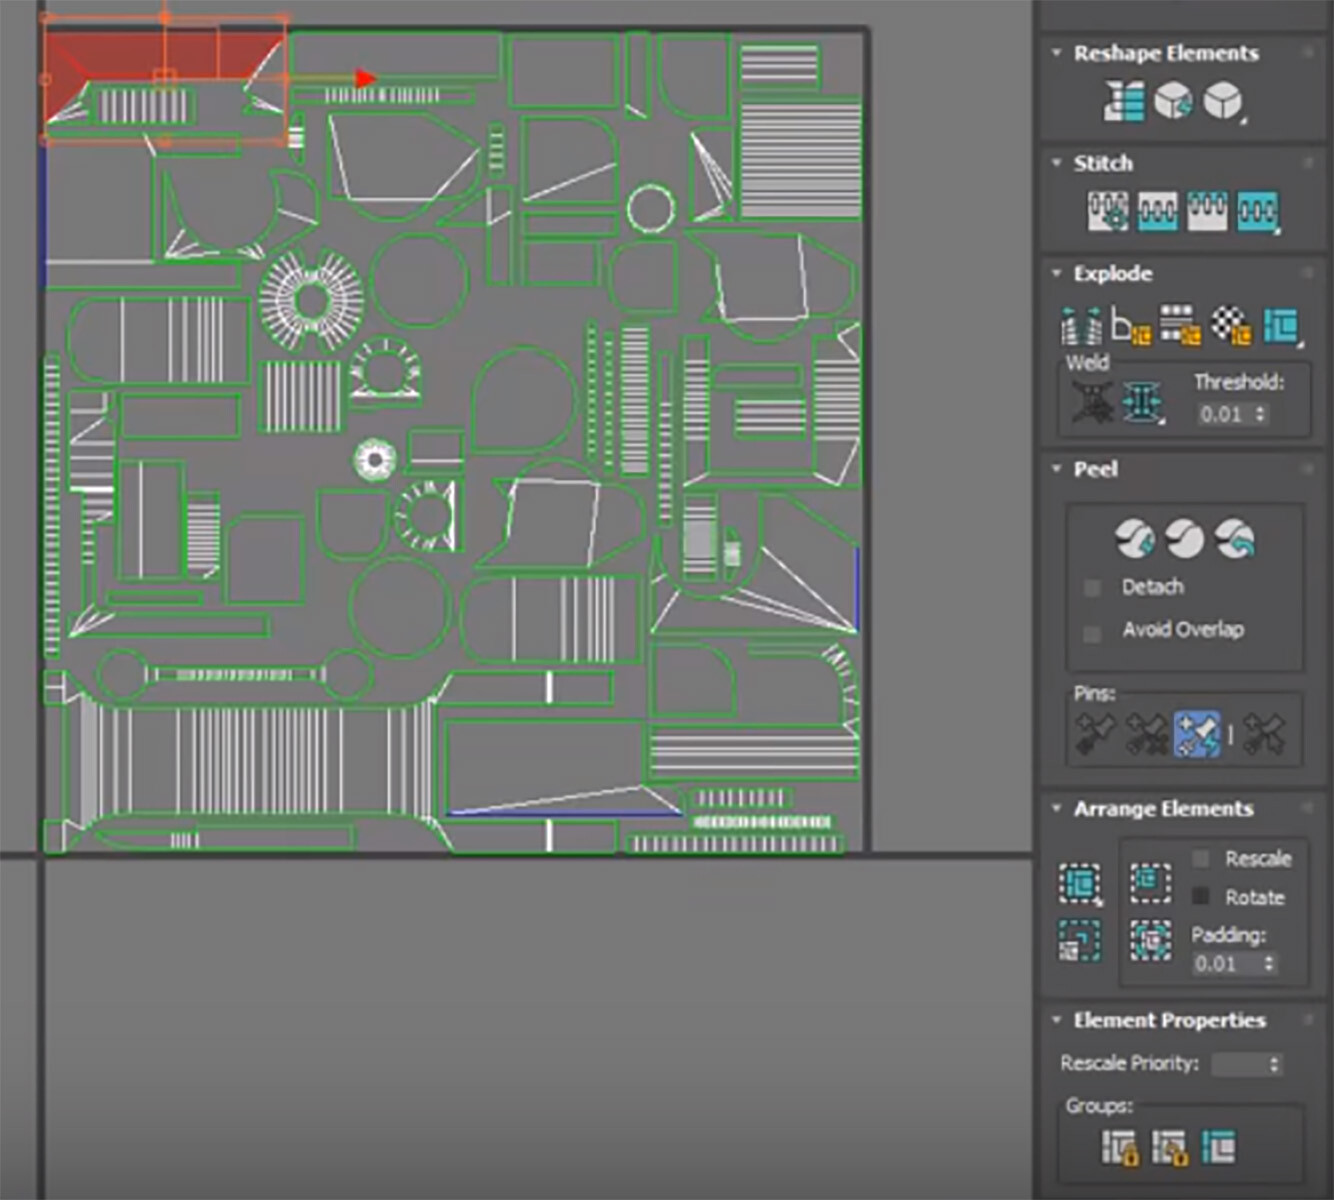
This packs everything tighter and allows us more resolution.
Scale the islands you are not going to see down and repack normalize again,
to re-pack UV and this will again improve our resolution.
One last thing we need to do is assign a smoothing group to each island again.


TEXT TOOLS
In TexTools, select smoothing groups from UV shells
Here is another great youtube resource. Make sure you subscribe to get all the latest updates. Modeling UV unwrapping and Texturing a Fuel Tank in 3Ds Max
To unwrap a object by default, use “Mapping”, Flatten image.
Default are normally good enough

Defaults:

The defaulted result:


To export the map to Photoshop do the following:
Click on Tools, Render UVW Template
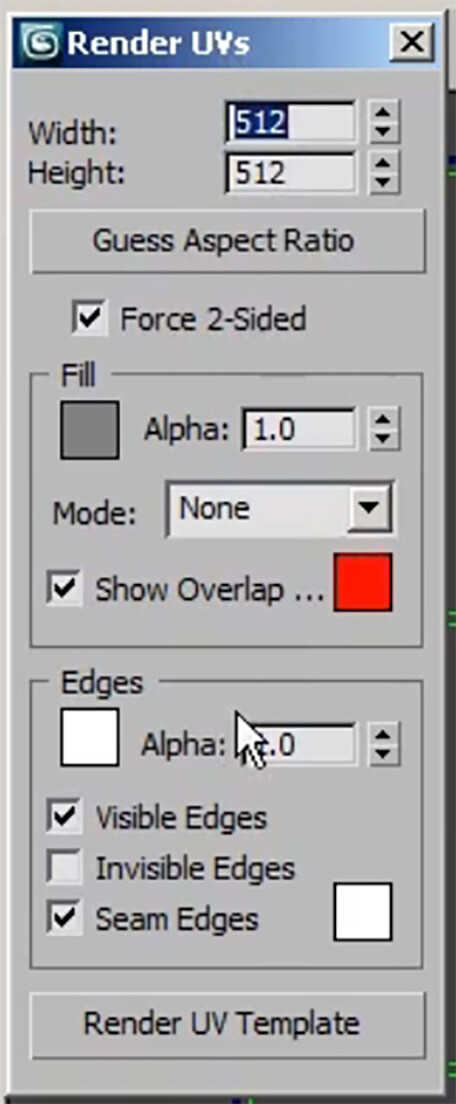 For games, stick with a power of 2 for UV map size
A window like below will open

Edit UVW’s Window - Options
Save Current Settings As default - Good for maintaining settings you have changed to always open up.
When saving UV wires use the following settings
When saving UV wires/layout templates use the following settings

Preferences - Unwrap options If changing any of these settings, make sure to click "set as default option", to save changes
Modeling Tips
i found a youtube video that explained a lot of the information below. I tried to locate his tutorial but was not abke to, to give him credit for this resource

Always good to model in pieces to make unwrapping easier and manageable.
Instancing & Stitching Tool
Some quick ways to unwrap a box. Select all, Mapping, Flatten All.
This will create a basic flatten texture.
Stitching tool is great to connect edges of like faces. Make sure you are in edge mode and not element mode. Right click and select Stitch Selected.

To see what edges got stitched, make sure the Box6 is white, see image below:


Stitching UVs will allow all edges to be butted up against each other to make UV’ing easier.
The result of all edges stitched together, see below

Unfold Flat Option, helps to unfold rounded edges into a flat map, see below
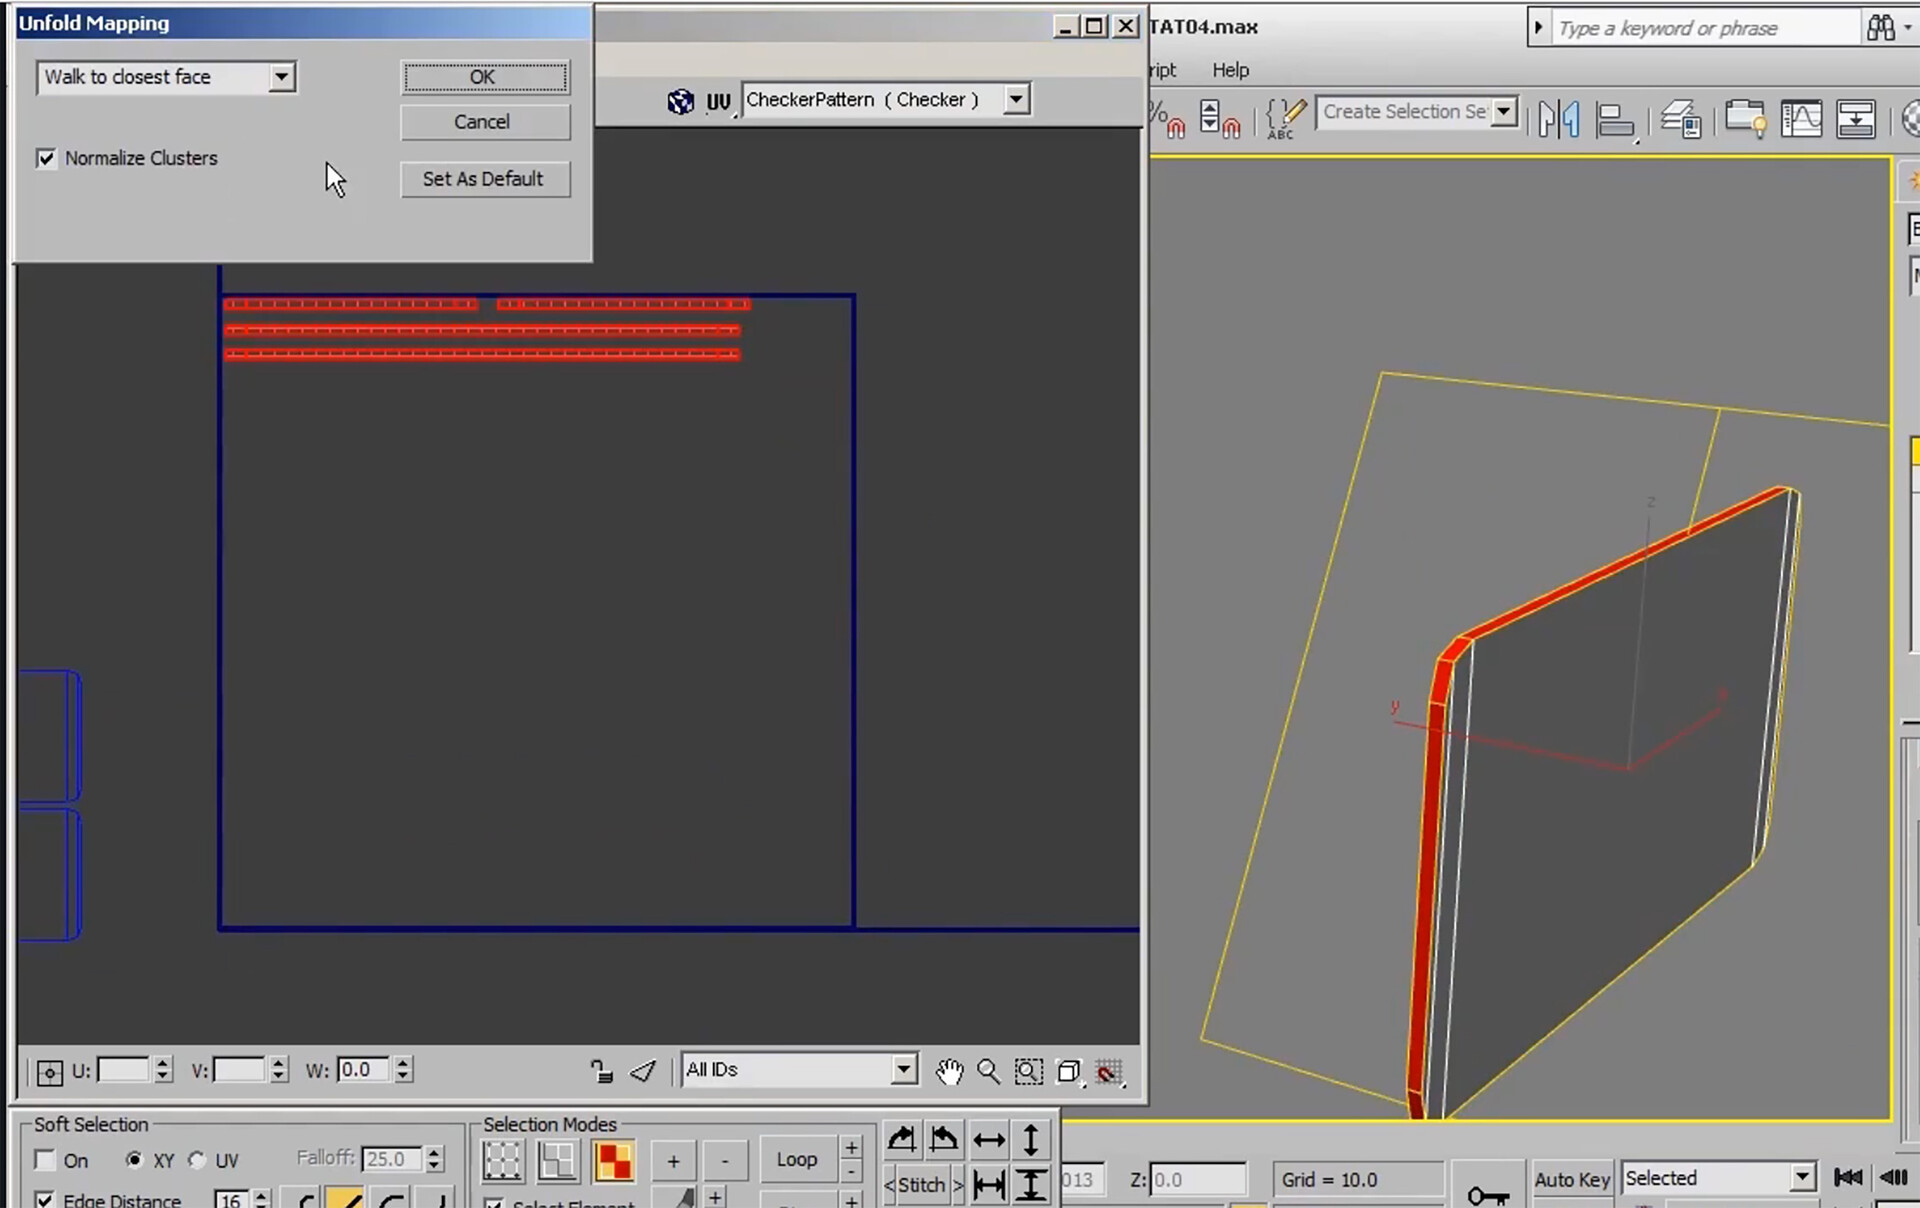
Great for cylinder edges, planar edges
When selecting object, use the Detach option to separate geometry for ease on UV mapping later. Use UVW Unwrap to create UVs for parts.
The peel option lays out rounded objects in a flattened format
Convert Edge selections to seams
Ctrl+ W - weld seems togethe


To scale all UVs equally: Use the Rescale Element Button:

To Get UVs all in the same space, use Pack Custom Options


GREAT RESOURCES
3DS Max 2018 Class #24 (UV Layout)
The larger an Island uses in a UV space, the more detail will be shown.


Small Checkers = High Quality and Large Checkers = Low Quality
MORE RESOURCES
3DS Max 2018 Class #28 (UV Layout Options)
3DS Max 2018 Class #29 (Unwrapping a Square Table)