This article is from lots of different sources and has been a great reference for me to understand the technicalities of 3D modeling. I should say Fundemantals to be successful. This article is really the basics and hopefully more experienced modelers will add to this article.
PRIMITIVES, MESH, AND POLY MODE
Primitives are basic shapes, that you cant do much with as they stand.
Edit Poly Mode, now allows you to modify the object.
Mesh Mode. allows you to do basically the same thing, but is sort of a legacy, as in what we used to use mostly and you don’t get to use as many tools as you get with edit poly. Most people used Edit Poly mostly.
Edit Mesh does allow you to modify hidden edges which Edit Poly doesn't allow you to do.
CTRL + Backspace to delete lines & verts
Hold down S to snap vertices together
FFD = Free Form Defamation - Box Mode
To weld 2 vertices that share the same coordinates use weld command.
Verts have to be on top of each other

Triangles & Quads
Both triangles & quads are polygons
All game engines render Triangles and not quads.
All quads are actually created by 2 triangles
Swift Loop is an excellent tool for creating divides:
We model in quads because its easier for the software to understand the mesh.
Red one below is all in quads and the blue one is in tris.

Top of circles are called nGons and they are bad to have in the model. Its confusing to the software. As seen below its a mess of lines.
BACKFACE CULLING
When the system renders both sides of a polygon
Need to get in the habit of right clicking one objects and make sure Backface culling is checked
This stops the software from rendering both sides of an object.
NORMALS & FLIPPING NORMALS
To Display normals see below 
To check Normals, Render a scene and all black areas displays normals facing wrong way.
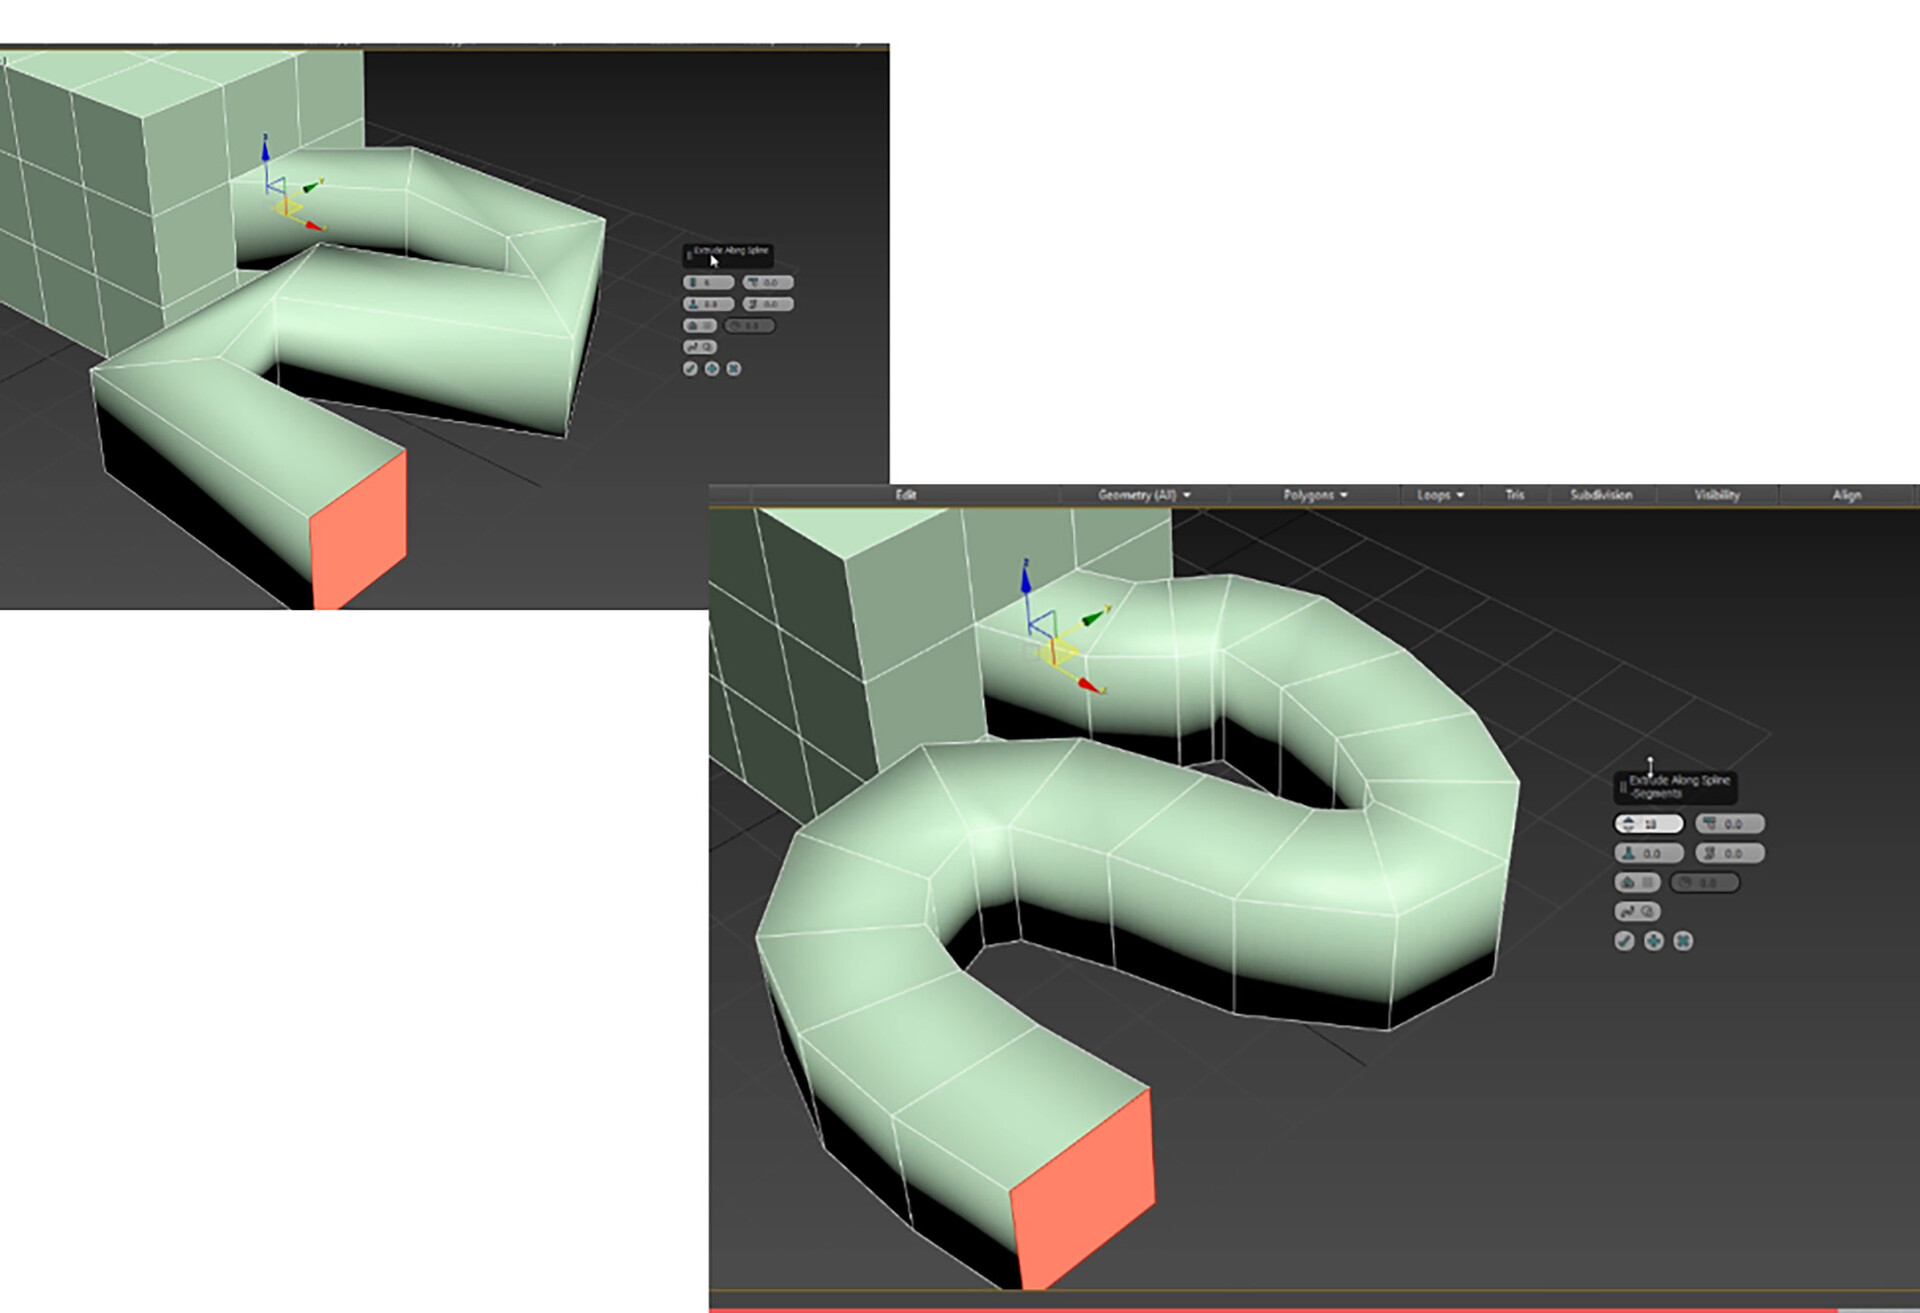
EXTRUDE ALONG A CURVE
First create a cube or something 
Then we need to create a line to extrude along a path

If you hold the left mouse button down, you can create curves.
Right click to end the operation
Move the line to the location you want the box to move from.
Then if you go to Interpolation, you can control the quality of the line
Select a polygon on the box
Then locate the command “Extrude Along Spline” Command:
SMOOTHING GROUPS
Helps to tell the renderer how to smooth out the edges from one polygon to the next Edit Normal - Shows the information of each polygon
When smoothing, any angle 45 degrees or less will be smoothed together

Now that these polygons are smoothed out, the vectors between the polygons
are now sharing the space and hence the smoothness. These polygons
are now sharing the same smoothing group.
This allows the light to be calculated correctly for each group.
RE-SETTING XFORM
We have 2 objects with their properties of x=4000, y=3000, z=3000 
Now we scale the red box up and you will notice the Dimensions of the box have not changed.. This property helps reset the meshe's Axis to original location.
Will help when exporting you model to other applications Once the modifier has been added the information within the scaled polygon has been updated..
EDGE REMOVAL
You can easily remove edges you down want, by using the remove command. You don't want extra polygons that will effect performance of the gaming environment on slower devices
 Bevel inside of axe using Extrude, Local Normals
Bevel inside of axe using Extrude, Local Normals Ctrl+Backspace+Delete to remove
When extruding you can use Local normals option to extrude faces local to their normals as opposed to Global Normals to get different shape Bevel inside of axe using Extrude, Local Normals
Insert Vertices Within a border.
Select a border
Under Edit Borders, select Insert Vertex